


Laura W. answered • 05/17/19
Microsoft Office Trainer and Author
You can do this with a bit of code. I'm not sure which version of Visual Basic SSRS uses, but the code below will work in Excel. You can copy and paste the code and perhaps tweak it if necessary.
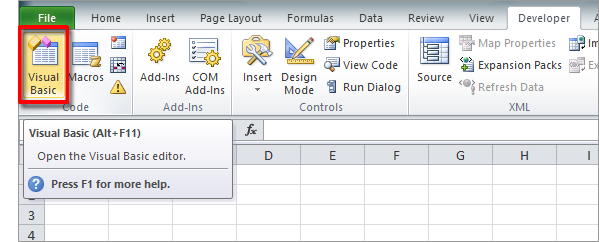
On the Developer tab, click on Visual Basic. (If the Developer tab doesn't show you can modify the Ribbon in Options.)
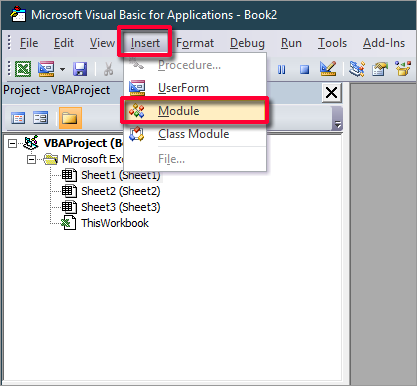
When the Visual Basic window opens, click on Insert > Module.
When the new module appears, copy and past the following code:
Sub TimeStampSave()
‘Will create a routine to add the date and time to the name of a file
‘The following 5 rows declare the variables
Dim varWB As Workbook
Dim varSTR As String
Dim varOldName As String
Dim varDATE As String
Dim varFNAME As String
‘This section will add the current time-stamp to the file name
Set varWB = ActiveWorkbook
varOldName = varWB.Name
varSTR = Left(varOldName, Len(varOldName) – 5)
varDATE = Format(Now, “yyyy-mm-dd hh-mm”)
‘This section will save the file as macro-enabled or not
If Right(varOldName, 4) = “xlsm” Then
varFNAME = Application.GetSaveAsFilename(varSTR & ” ” & varDATE, “Excel Macro-Enabled Workbook (*.xlsm),*.xlsm”)
Else
varFNAME = Application.GetSaveAsFilename(varSTR & ” ” & varDATE, “Excel Workbook (*.xlsx),*.xlsx”)
End If
varWB.SaveAs (varFNAME)
End Sub
When you paste the code into the module, it will look something like this:
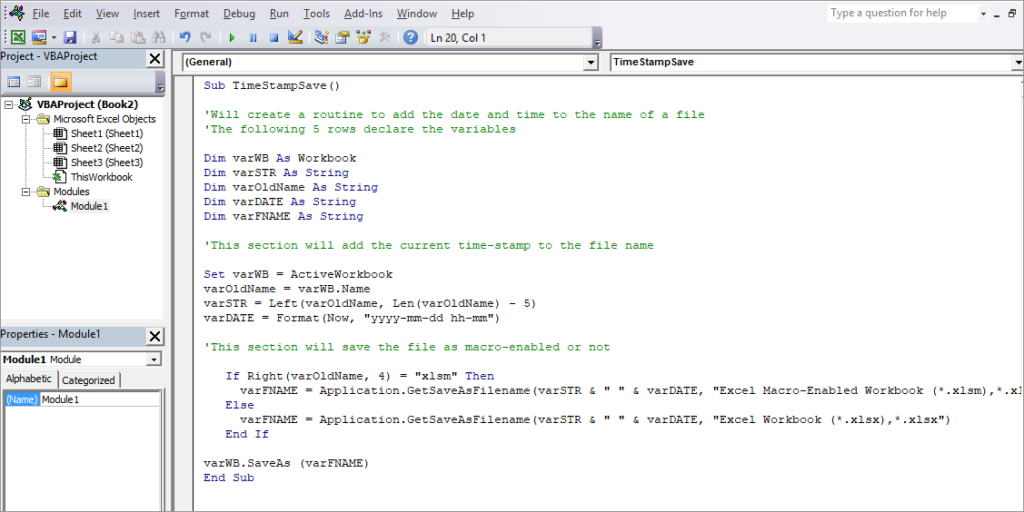
Don’t worry if your spacing looks different. That won’t matter. The lines in green (beginning with apostrophes) are comments.
Now you can close the Visual Basic Editor and go back to your Excel file.
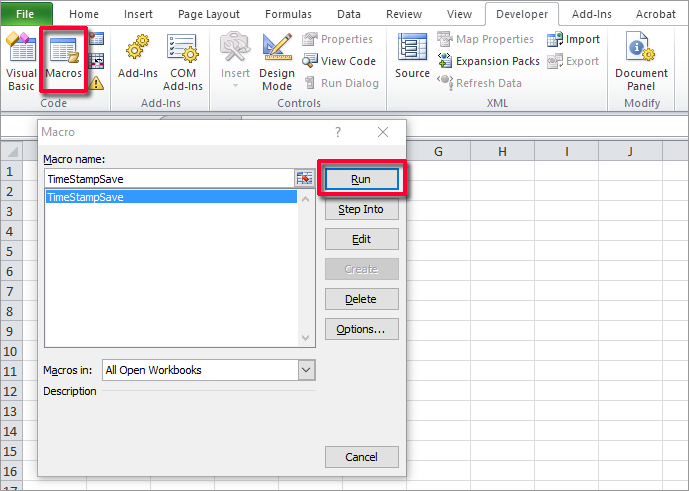
To run the macro, select Macros from the Developer tab, select TimeStampSave and click Run.
It will append the current time stamp to the name of the file.
If you want to make this macro always available, save it to Personal.xlsb.
The steps to add the code may be slightly different. Hope this helps.


